This post may contain affiliate links. I get commissions for purchases made through these links.
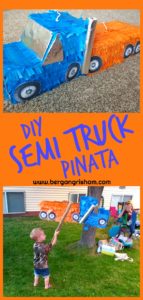
My little man turned 3 last week! His favorite things in the world right now are semi trucks and trailers. We threw him a little party and wanted him to experience the classic party pinata.
However, the only semi truck pinata I could find was online. I didn’t want to pay for shipping and even with a few weeks till his party, it would be cutting it close to get it in time. So, I made my own!
It was way cheaper to make a pinata than to buy it. Plus, I like a good creative challenge and had a lot of fun.
What you need:
- A rectangle box
- A square box
- A box cutter
- Scissors
- A pen or pencil
- Packing tape
- Scotch tape
- 3-4 packages of tissue paper
- Tin foil
- 2 paper towel rolls
- Rope

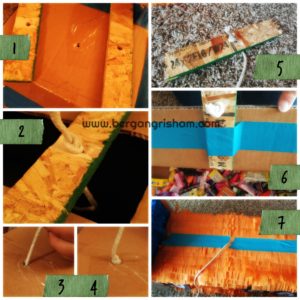
- Start with a rectangle box.
- Using a box cutter, cut off the four short flaps.
- Take the square box and draw the shape of the windshield and hood on the side. Using a box cutter, cut along the lines (but only on the sides).
- Use the box cutter to perforate the inner line of the box where the top of the windshield would be.
- The front of the box will now fold down to shape the windshield, hood, and grill of the truck.
- Cut off the excess cardboard.
- Tape the cut pieces down to shape the truck.
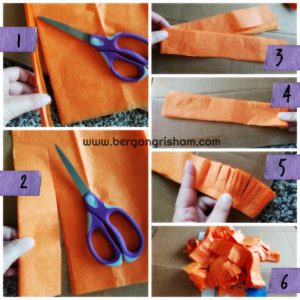
- Leave all the sheets of tissue paper stacked up and cut the folds out.
- Cut each section between the folds into two strips.
- Fold each strip in half to save time cutting.
- Line the halves up.
- Cut 3/4 of the way up all along the strip.
- Cut lots of strips so you don’t have to stop decorating to cut more.
- Drill holes through two pieces of wood. The wood will provide support to hang the pinata.
- Put one end of the rope through one piece of wood and tie a knot.
- Put the rope through the top of the square box.
- Tie a knot on the top of the box.
- Put the other end of the rope through the other piece of wood and tie a knot.
- Tape the wood to the top flap of the rectangle box.
- Tape the box closed with the rope coming through the top and tie a knot.
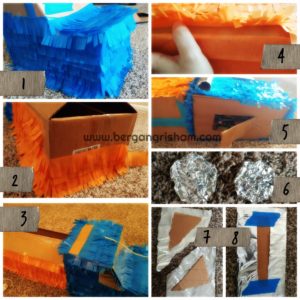
- Start at the bottom of the box and tape the tissue paper around and up.
- Continue taping…
- Continue taping on the top of the box…
- Use one or two pieces of tissue paper to cover the bottom of the boxes. When you cut it, leave enough overhang to wrap it up under the fringed tissue paper.
- If you want candy in the truck as well as the trailer, add the candy before covering the box completely.
- Crumple tin foil into circles for headlights.
- Wrap scrap triangles of cardboard in tin foil for the passenger and driver side windows.
- Wrap rectangles in tin foil for the windshield and front grill.
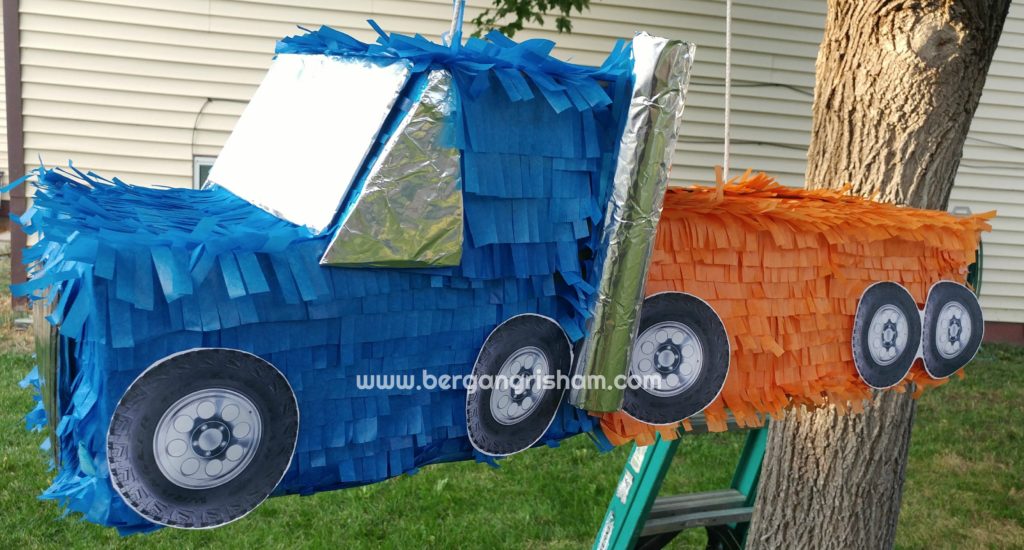
I finished the truck by drawing on the grill with Sharpie, wrapping paper towel rolls in tin foil for the exhaust stacks, and printing pictures of tires to tape on the sides.
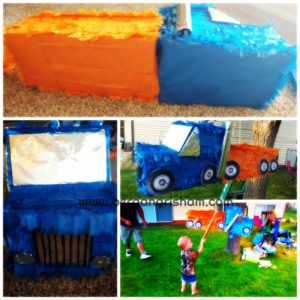
The Results
Overall, the pinata turned out better than I expected. I was pretty proud of myself, and two hours after I finished it, it was broken apart. There are a few things I would have done differently:
- I wouldn’t have cut the four short flaps off of the rectangle box. If I hadn’t, maybe the trailer wouldn’t have fallen off so quickly.
- I wouldn’t have taped fringed tissue paper where I was going to put additional decorations. The grill, headlights, and exhaust stacks didn’t stick on very well.
- I would have attached the trailer to the truck better. I put a rope through a hole between the boxes and tied each side, but that didn’t make the pinata very stable. I would have tried attaching the boxes at all four corners.